Cint Panel Configuration Manager
Panel Configuration Manager allows each Cint panel to be configured with the API key and secret, and for the Q_Panel variables to be mapped to the equivalent Cint variables.
From the CINT menu, select Panel Configuration Manager. A list of panels will be displayed.

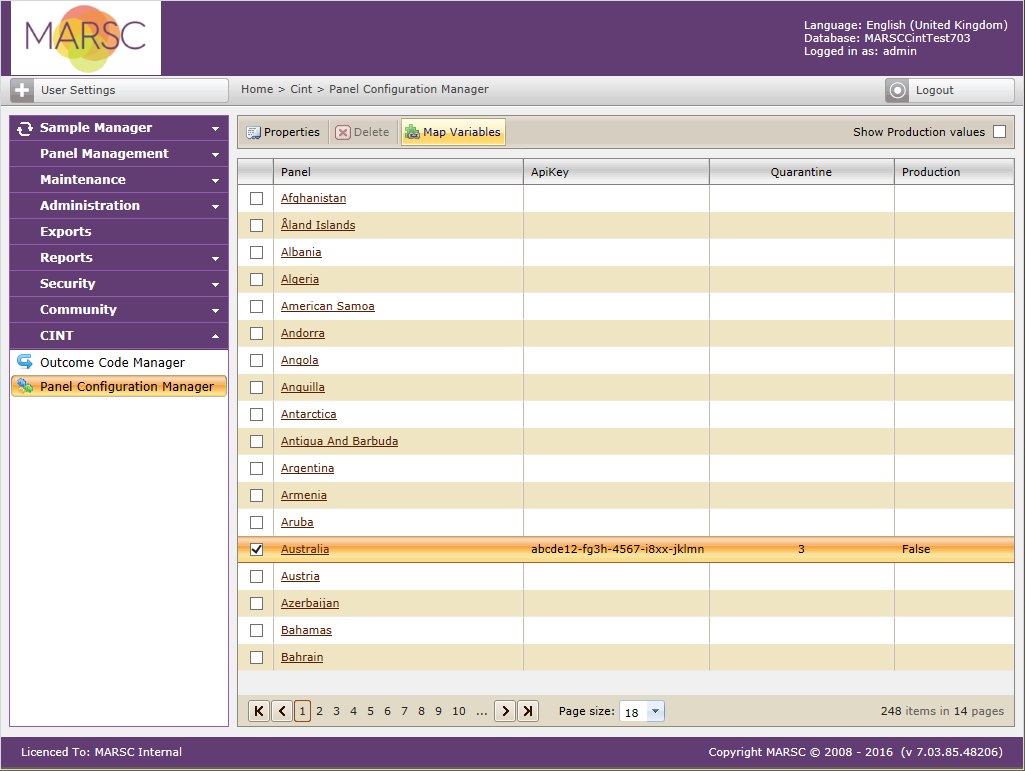
If any of the panels have already been configured with an ApiKey this will be displayed, along with the quarantine period. By default, the sandbox panel values will be displayed. To show the production values instead check the Show Production values check box.
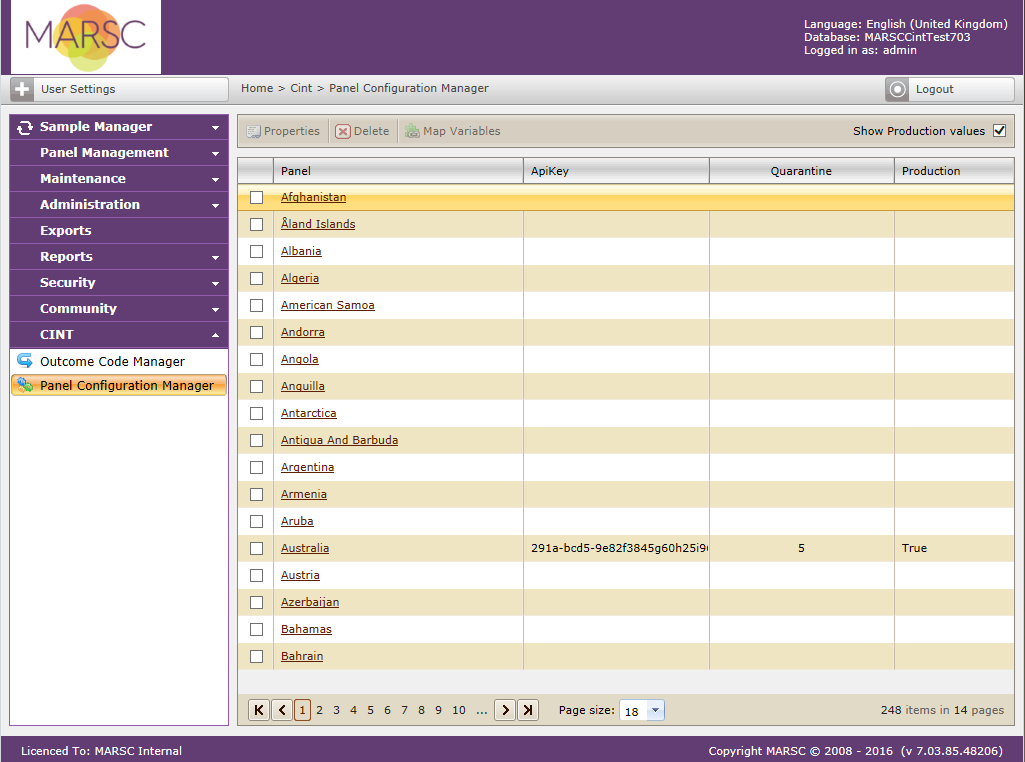
To view or edit the properties of a Cint panel, select the panel by clicking on the panel name or by checking the box next to the panel name and selecting Properties from the toolbar. The Edit Panel Configuration dialog will be displayed.

The Production values check box will show whether you are editing production or sandbox values.
Enter the properties of the panel using the following fields:
Description: this is the panel name and cannot be changed.
Api Key: this is the Cint Api key for the panel as supplied by Cint, there may be a different key for the production and sandbox panel.
Api Secret: this is the Cint Api secret for the panel as supplied by Cint, there may be a different secret for the production and sandbox panel.
Quarantine: this field specifies the number of days a panellist will be quarantined after being selected for a survey in Q_Panel. This information will be passed to Cint and the panellist will not be selected for another survey in either Cint or Q_Panel within the quarantine period. The exception to this is panellists defined as Supertalkers who always have a quarantine period of 1 day. By default the quarantine period is set to 5 days. If the quarantine period is set to 0 the panellists will not be quarantined.
In order to use these default quarantine periods the Q_Panel Job Queue must use a custom job handler which supports quarantines periods and Supertalkers.
Test button: after setting the Api Key and Secret, click on the Test button to check whether the correct details have been entered. This will either return a message informing that a connection to the Cint panel has been successfully established or will return an error.
Save changes to the panel settings by clicking on the OK button.
Mapping Cint variables
To map the variables for a particular panel, select the panel required by clicking on the check box next to its name. The Map Variables button on the toolbar will become enabled.
You will not be able to map variables unless the Api Key and Secret has been set up correctly as a connection to Cint is required for this function.
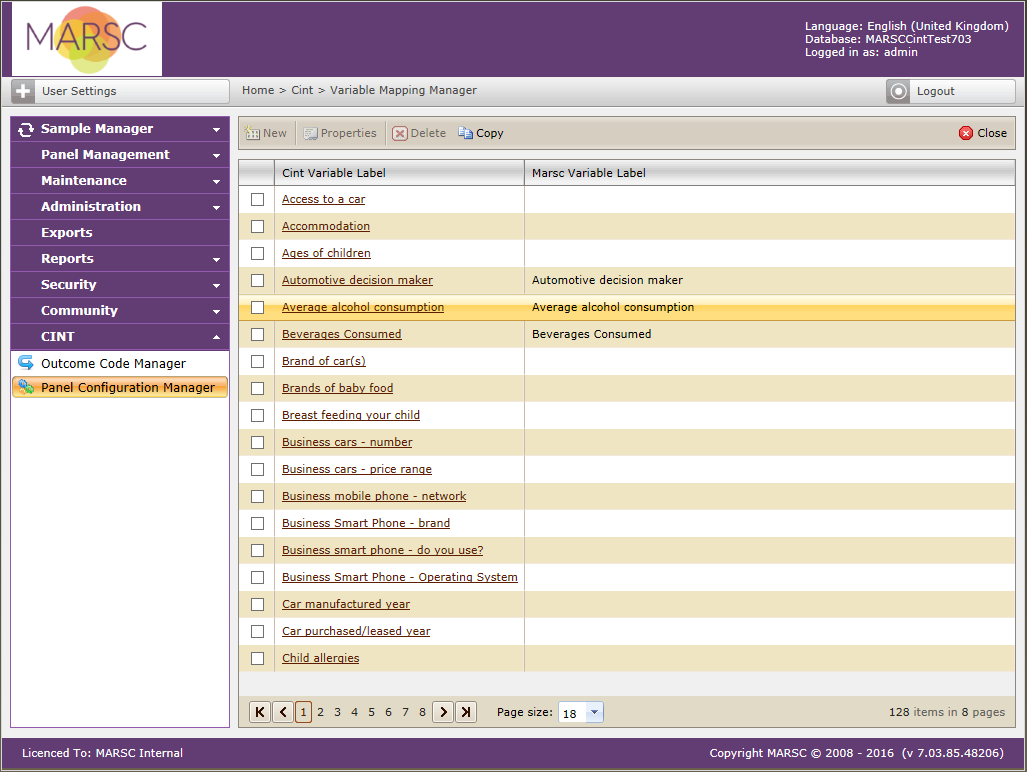
Click on Map Variables to display the Variable Mapping Manager screen.

A list of Cint Variable Labels will be displayed along with any mapping already defined.
To view the mapping details, select the Cint Variable Label by clicking on the name, or by selecting the check box next to the name and clicking on Properties from the toolbar.

This dialog shows the Cint Variable and the equivalent Q_Panel Variable. If the variable is coded, the list of codes and their equivalent Q_Panel codes are also shown.
Add a Cint Variable Mapping
To add a new mapping, select the required Cint Variable Label by clicking on the name. The New Cint Variable Mapping dialog will be displayed.
(Note that mappings only need to be set up once for each panel, and will apply to both production and sandbox version of the panel).

Select the required Q_Panel Variable using the Select button. The Select Variable dialog will be displayed.

The list of variables displayed within the folders will contain only variables that match the selected Cint variable type.
In particular, if the selected Cint variable is a single categoric variable, it will only show Q_Panel variables of the same code type. That is:
- if the Cint variable is defined as numeric coded then only Q_Panel numeric coded categoric variables will be shown in the list
- similarly, if the Cint variable is defined as text coded then only Q_Panel text coded categoric variables will be shown in the list
Hierarchy Manager may also be used to restrict the variables shown. In order to be available for use in a Cint mapping, a variable must have the ‘Allowed in Cint variable mapping’ check box ticked within Hierarchy Manager.
Find the variable you require either by navigating to it by expanding the appropriate folders, or by performing a variable search.

If the selected variable is categoric, you will also need to map the codes.

This can be done manually, by selecting the appropriate Q_Panel code from the drop-down list for each Cint code, or the Auto Map function can be used. The Auto Map function will attempt to map the codes for you – any it cannot match it will leave for the user to complete.

When all the codes have been mapped click OK to save the changes.
The Cint Variable will now appear with the equivalent Q_Panel variable label populated.
To finish viewing and/or editing the mappings click on the Close button to return to the Panel Configuration Manager.
Delete a Cint Variable Mapping
To delete the mapping for a Cint Variable, select the variable by clicking on the check box next to its name and clicking on Delete from the toolbar. The mapping will be cleared from this variable.
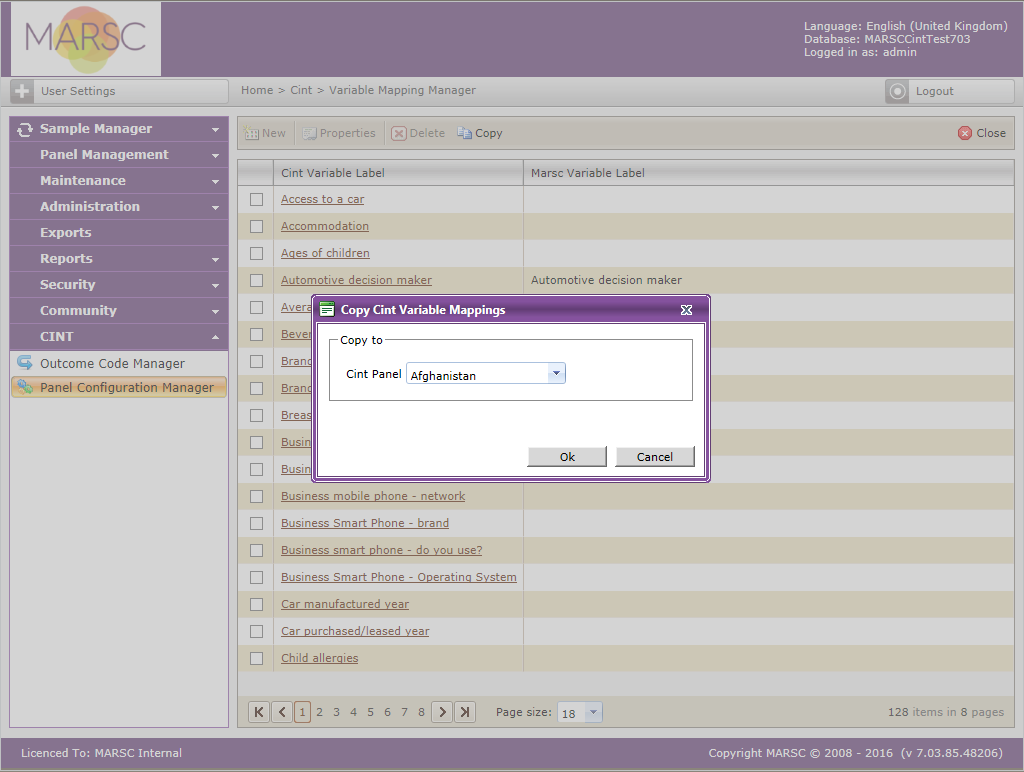
Copy Cint Variable Mappings
To copy mappings between panels click on the Copy button from the toolbar.
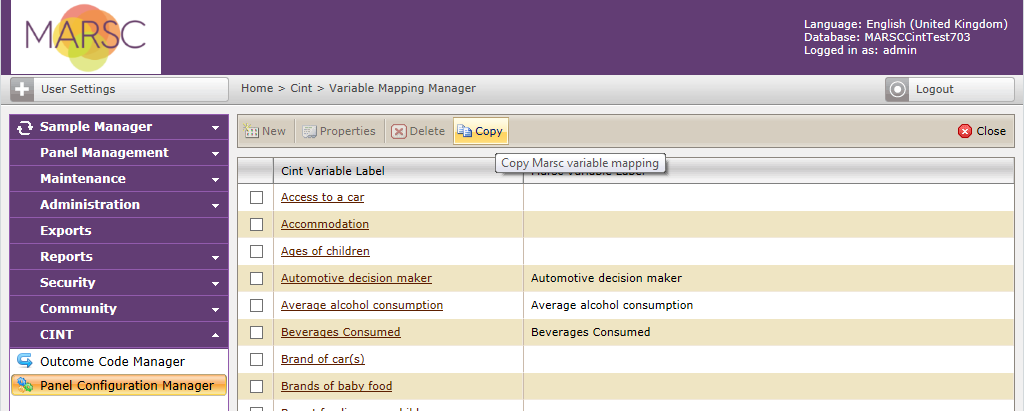
Select the panel you want to copy from and click on OK.
The Cint variable mappings will be copied from the selected panel.
Note that currently only variables which are Cint panellist properties will be copied i.e. First Name, Last Name, Email Address, Gender and Postcode, as these variables are common to all panels.