Mapping Q_Panel variables to Kentico variables
By default, panellist information entered on the registration or activation form (such as email address, first name, and last name) is mapped between Q_Panel and Kentico and automatically kept in sync throughout the system. The Q_Panel Registration and Activation forms can be customised to allow other fields to be entered and kept in sync with the associated Q_Panel variables.
This can be done using the following steps – it is important that all steps are followed to ensure the mapping is complete.
- Add new field to Kentico User table
- Add new field to appropriate forms
- Add Q_Panel/Kentico mapping
1a. Add new field to Kentico User table (instructions for Kentico 7)
To add a new field go to Site Manager/Development menu and select System Tables from the content tree on the left-hand side.
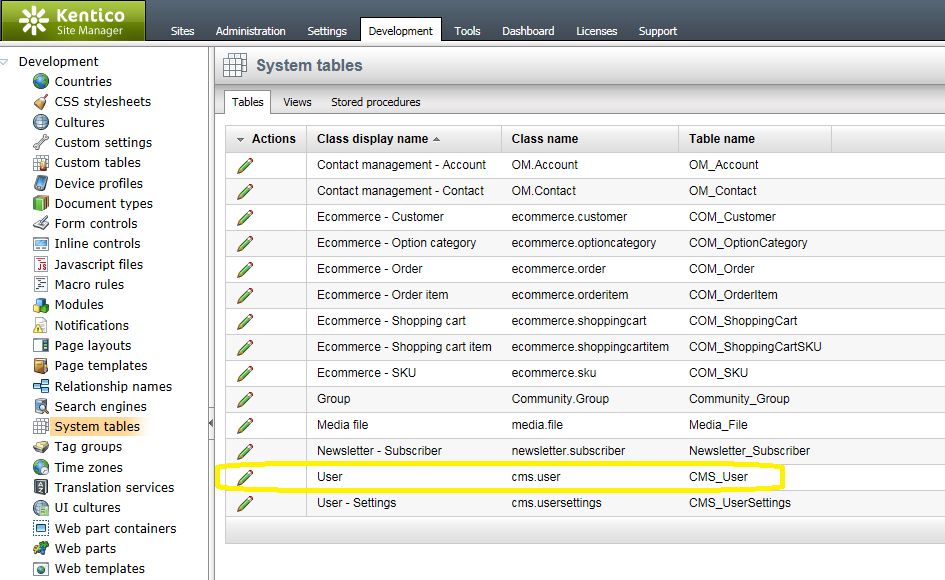
Edit the User table by clicking on the Edit icon (pencil) next to the User name.

Using the Fields tab, go to the bottom of the list of fields and use + to add a new field, and completing the following:
Column Name
It is recommended that the column name should start with MARSC, e.g. MARSCGender, in order to make it easily identifiable.
Attribute Type/Size
Select an appropriate type which should match the Q_Panel variable that it will be mapped to.
Note that Q_Panel single categoric variables can be either defined as numeric coded or text coded – the Kentico attribute type must match.
Q_Panel multi-coded categoric variables are not currently supported
Field Caption
Enter the text of the question that is to be displayed on the form.
Form Control
If the field is to show a drop-down list of answers using an existing MARSC categoric variable, then this should be set to MARSC Code selector, and the MARSC variable should be selected (using the MARSC Column field below). Otherwise, select an appropriate Form Control for the field type.
MARSC Column
If the Form Control is set to MARSC Code selector a MARSC variable must be selected.
Save the changes.
1b. Add new field to Kentico User table (instructions for Kentico 9)
To add a new field use the Modules application from the Development application group. Select the Membership module and click on Edit (pencil).
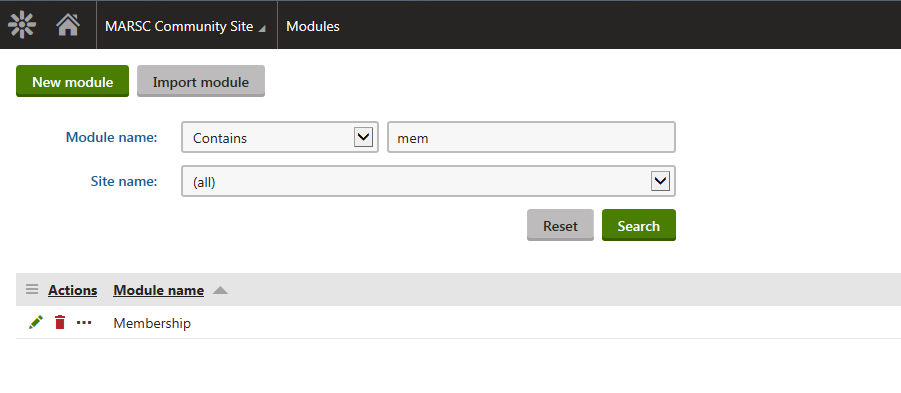
Within the Membership module select Classes from the menu on the left-hand side.

Edit the User table by clicking on the Edit icon (pencil) next to the User name.

Click on Fields from the menu on the left-hand side.

Go to the bottom of the list of fields and use the New Field button to add a new field. Complete the following:
Field Name
It is recommended that the column name should start with MARSC, e.g. MARSCGender, in order to make it easily identifiable.
Data Type/Size
Select an appropriate type which should match the Q_Panel variable that it will be mapped to.
Note that Q_Panel single categoric variables can be either defined as numeric coded or text coded – the Kentico attribute type must match.
Q_Panel multi-coded categoric variables are not currently supported
Field Caption
Enter the text of the question that is to be displayed on the form.
Form Control
If the field is to show a drop-down list of answers using an existing MARSC categoric variable, then this should be set to MARSC Code selector, and the MARSC variable should be selected (using the MARSC Column field below). Otherwise, select an appropriate Form Control for the field type.
MARSC Column
If the Form Control is set to MARSC Code selector a MARSC variable must be selected.
Save the changes.
2a. Add field to forms (instructions for Kentico 7)
To add the new field to the MARSC Registration and Activation forms click on the Alternative Forms tab.

The new fields should be added to the Activation form (MARSC) and the Registration form (MARSC) in turn.
Edit the alternative form by clicking on the Edit icon (pencil) next its name, and select the Layout tab.
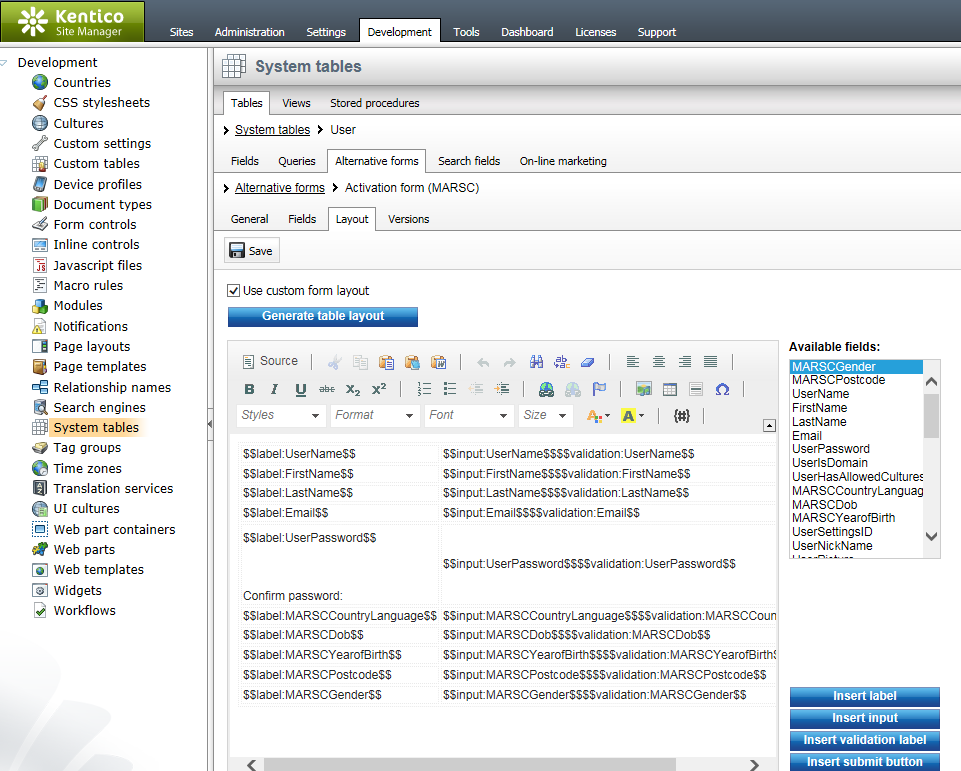
Click on the new field from the Available Fields list and add to the required position in the form as follows:
- Position the cursor within the table layout and right-mouse click to add a row to the required position.
- Use the Insert Label button to add the selected field label within the new row.
- Use the Insert Input and Insert Validation Label buttons to add the selected field within the new row.
Save the changes.
2b. Add field to forms (instructions for Kentico 9)
To add the new field to the MARSC Registration and Activation forms click on Alternative Forms from the menu on the left-hand side.

The new fields should be added to the Activation form (MARSC) and the Registration form (MARSC) in turn.
Edit the alternative form by clicking on the Edit icon (pencil) next to its name, and select the Layout tab.
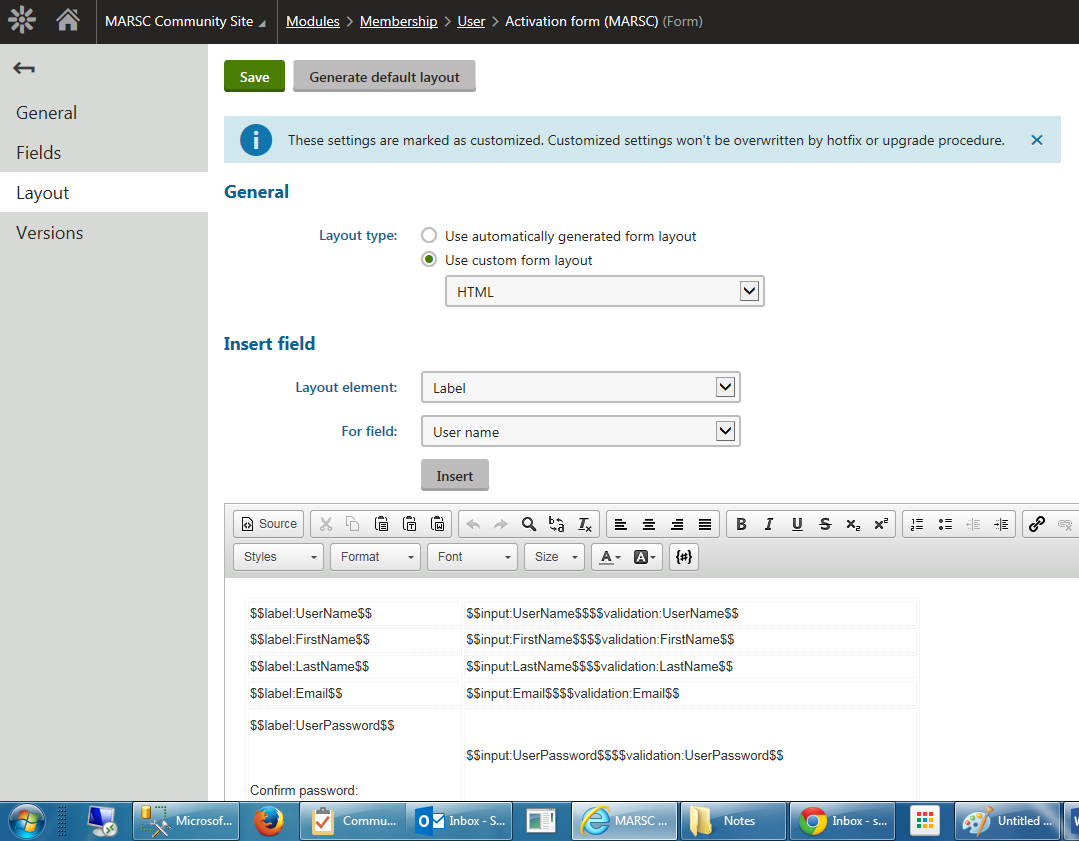
Using the Layout tab, add the new field by selecting the Layout element and Field from the Insert Field dialog, and adding to the required position in the form as follows:
- Position the cursor within the table layout and right-mouse click to add a row to the required position.
- Use the Layout element Label to add the selected field label within the new row.
- Use the Layout elements Input and Validation Label to add the selected field within the new row.
Save the changes.
3. Add a Kentico Variable Mapping
From the Q_Panel Community menu, select Kentico Variable Manager. A list of Kentico variables will be listed along with any mappings already defined.

To map a variable, select the Kentico Variable by clicking on the name, or by selecting the check box next to the name and clicking on Properties from the toolbar.

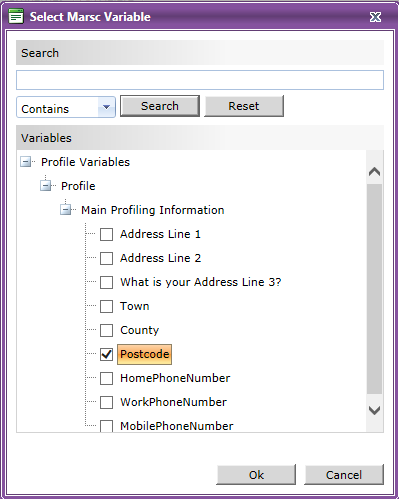
Select the required Q_Panel variable using the Select button. The Select Variable dialog will be displayed.
The list of variables displayed within the folders will contain only variables that match the selected Kentico variable type.
Note that Q_Panel single categoric variables can be either defined as numeric coded or text coded – the list of variables shown will be those that match the selected Kentico variable attribute type. If you do not see the list of variables you expect, check that the Kentico variable and the Q_Panel variable are of the same type (Variable Manager will show whether a Q_Panel categoric variable is Numeric Single Coded or Text Single Coded).
Find the variable you require either by navigating to it by expanding the appropriate folders, or by performing a variable search.
Hierarchy Manager may also be used to restrict the variables shown. In order to be available for use in a Kentico mapping, a variable must have the ‘Allowed in Kentico variable mapping’ check box ticked within Hierarchy Manager.
Click on OK to accept the selected variable, and OK to select the mapping. The screen will be updated to show the new mapping.

Delete a Kentico Variable Mapping
To delete the mapping for a Kentico variable, select the variable by clicking on the check box next to its name and clicking on Delete from the toolbar. The mapping will be cleared for this variable.