Using profilers
A Q_Community website can include one or more profiler questionnaires. Profiler Manager can be used to build and maintain the profilers. Panellists are asked to complete (or update) profilers containing a number of questions about themselves and may collect reward points for doing so.
Profilers can be displayed using the MARSC My Profilers web part and run using the MARSC My Profiler Wizard web part.
From the Community menu, select Profiler Manager. If there are already profilers set up in the database they will be listed.

To create a new profiler, start in Profiler Manager and click on New in the toolbar to open the New Profiler dialog.

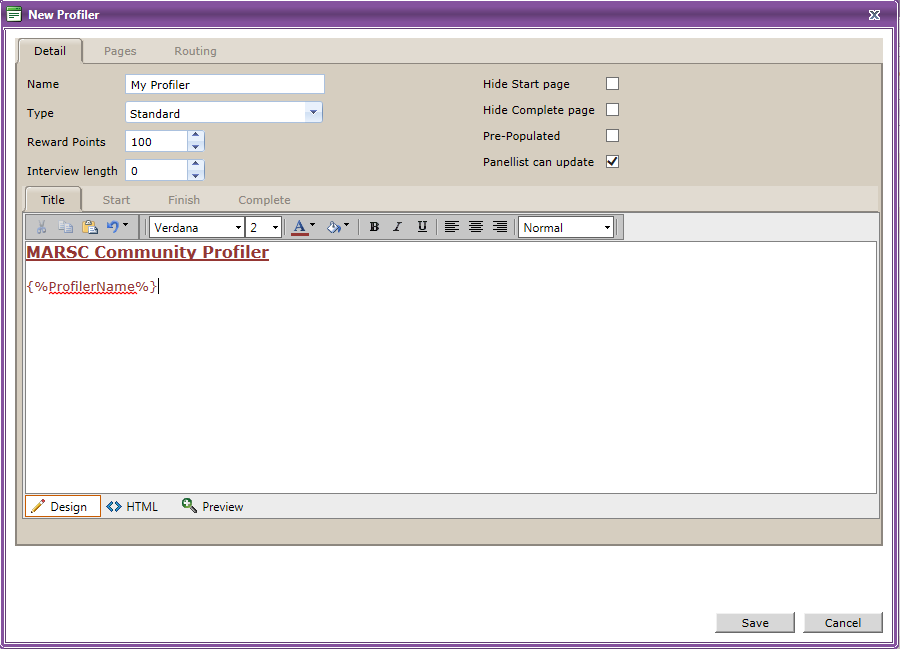
Profiler details are arranged over three tabs:
| Detail | Basic items about the profiler such as name, type of profiler and the number of reward points; the user can also format notes to be displayed on the pre-defined pages of the profiler. |
| Pages | Profiler pages and questions are defined here. The user can specify how many pages they require, which questions are on each page, how they are to be displayed and any validation required. |
| Routing | A profiler normally displays each page sequentially; however routing rules may be defined which change the order of pages displayed based on the answers to questions. The user can define conditions and specify which page to route to if the condition is true. |
Enter the main properties of the profiler using the Detail tab which contains the following fields:
Name
This is a mandatory field and should contain a brief description of the profiler which panellists will see in My Profilers. The profiler name must be unique.
Type
There are four profiler types.
| PreRegistration | A pre-registration profiler can be set up to run before the registration process in order to screen out potential panellists who do not meet the requirements. This type of profiler should contain one or more questions along with appropriate routing rules to prevent the registration process unless the potential panellist answers match certain criteria. Answers to this type of profiler are not saved to Q_Panel. Only one profiler can be a PreRegistration profiler. |
| Registration | A registration profiler is the first profiler a panellist completes after registering on the community website. The community website can be set up to direct the new panellist to this profiler when they first log in. Depending on the website setup, completion of a Registration profiler can trigger the ‘Registration Complete’ event which can have reward points associated with it (reward points can be setup using Setting Manager). These would be in addition to any rewards points defined for the completion of the profiler. Only one profiler can be a Registration profiler. |
| Membership | A membership profiler is the profiler a panellist completes in order to can become a full member of the panel. The community website can be set up to direct the new panellist to this profiler in order to complete their membership. Completion of a Membership profiler will trigger the ‘Membership Complete’ event which can have reward points associated with it (reward points can be setup using Setting Manager). These would be in addition to any rewards points defined for the completion of the profiler. Only one profiler can be a Membership profiler. |
| Standard | The majority of profilers will be standard profilers. |
Reward Points
This is a numeric field which specifies the number of reward points a panellist will be given for completing this profiler. Rewards points can be set to between 0 and 10,000. Reward points are set to zero by default.
Interview Length
This is a numeric field which estimates the number of minutes it should take to complete the profiler. Interview Length is set to zero by default. This field is not currently used anywhere within the Q_Community website.
Hide Start Page
If this check box is ticked the Start Page will not be shown when the profiler is run.
Hide Complete Page
If this check box is ticked the Complete Page will not be shown when the profiler is run.
Pre-Populated
If this check box is ticked it is assumed that the data for this profiler is already populated in the database, and so the profiler will be automatically set to update only (i.e. the Complete button will be disabled, and the Update button enabled).
Note that if this check box is ticked, then the ‘Panellist can update’ check box must also be ticked – otherwise neither the Complete nor Update buttons will be enabled when the profiler is run.
Panellist can update
If this check box is ticked the profiler may be updated if it has already been completed. (I.e. the Update button will be enabled after the profiler has been completed). This check box is ticked by default.
Profiler Notes (Title, Start, Finish, Complete)
At the bottom of the screen is an area for adding some notes or description about the profiler. These notes will be displayed when the profiler is run using the MARSC My Profiler Wizard web part. Notes can be added and formatted for different areas of the profiler. These notes are optional.
Title
By default the title contains the profiler name, this can be added to, removed and/or formatted as required.
The contents of the Title tab will be displayed at the top of every profiler page.
Start
The Start page of a profiler is a pre-defined page which is the first page of every profiler. The contents of the Start tab will be displayed at the bottom of the Start page.
The Start page can be hidden using the ‘Hide Start page’ check box.
Finish
The Finish page of a profiler is a pre-defined page which shows that the profiler is finished. The contents of the Finish tab will be displayed at the bottom of the Finish page.
Complete
The Complete page of a profiler is a pre-defined page which shows that the profiler has been completed. It is the last page of a profiler. The contents of the Complete tab will be displayed at the bottom of the Complete page.
The Complete page can be hidden using the ‘Hide Complete page’ check box.
There are three views for each of the profiler notes tabs: Design (default), HTML and Preview. The Design view is a near-WYSIWYG editor; HTML allows you to edit the HTML code directly; Preview shows you the results of your editing in a non-editable preview mode.
The other buttons in the Design view have standard editing functions.
Once the fields on the Detail tab have been entered it is a good idea to save the profiler by clicking on the Save button. The profiler will be saved and you will be returned to the Profiler Manager screen where the profilers will be listed.

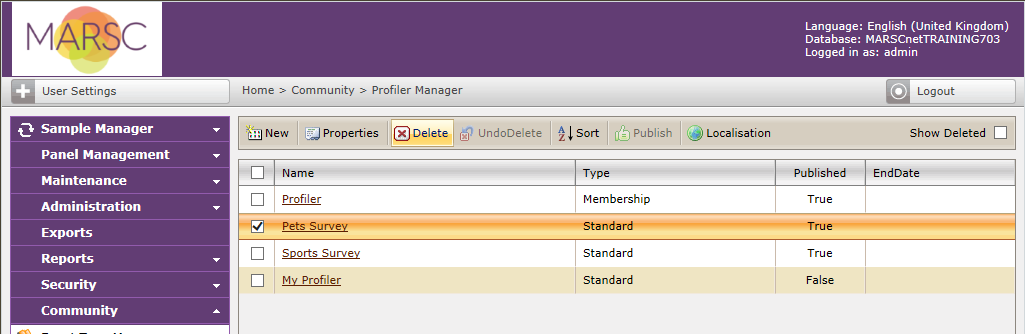
The list shows the profiler name and type, and a published flag which will display True or False. Only published profilers will be displayed on the Q_Community website. Currently End Date is not used in the system, so this will remain blank.
Save your work regularly using the Save function in the toolbar. If you leave a profiler without saving it you will lose all changes, including changes to pages, questions and routing.
Creating Profiler Pages
To start creating pages for the profiler go back into the profiler by selecting it by name from Profiler Manager or by checking the box next to it and selecting Properties from the toolbar.
Select the Pages tab to begin creating pages for the profiler.
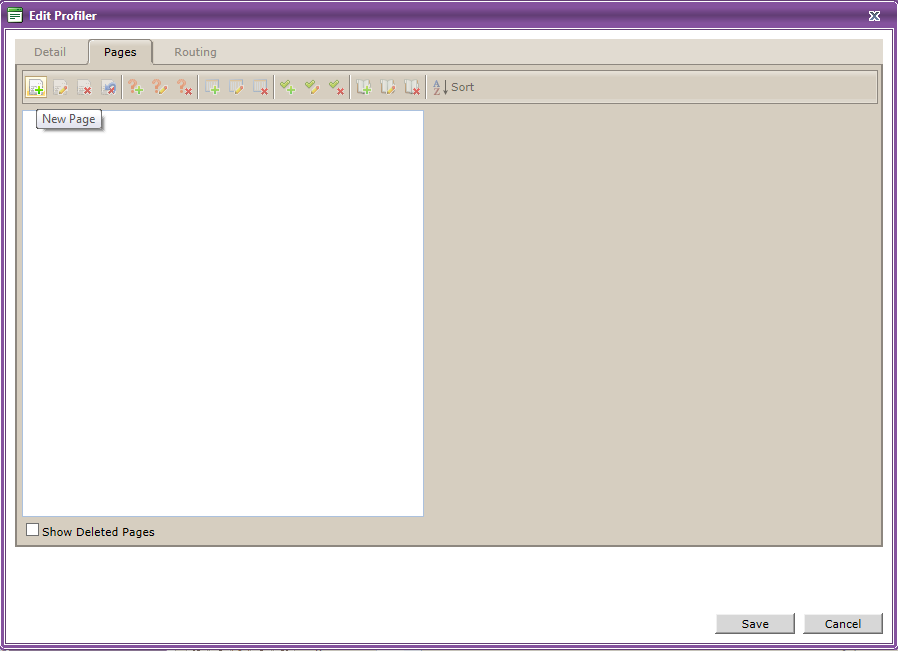
To create a new page, click on the New Page button on the toolbar to display the New Page dialog.

Enter the properties of the page using the following fields:
Name
This is a mandatory field and should contain the page name. The page name must be unique within a profiler. The page name will not be seen when running the profiler.
Page container Content
Notes may be added with formatting which will be displayed on the profiler page when it is run. These notes are optional.
A page content marker is provided by default which can be added to, removed and/or formatted as required.
Hide previous button
If this check box is ticked the Previous button will not be shown on this page when the profiler is run.
Hide next button
If this check box is ticked the Next button will not be shown on this page when the profiler is run.
Hide cancel button
If this check box is ticked the Cancel button will not be shown on this page when the profiler is run.
As before, there are three views for each of the page notes tabs: Design (default), HTML and Preview. The Design view is a near-WYSIWYG editor; HTML allows you to edit the HTML code directly; Preview shows you the results of your editing in a non-editable preview mode.
The other buttons in the Design view have standard editing functions.

Press OK to save the new page or Cancel to cancel the changes.
The new page will now be displayed on the left-hand side of the Pages tab.
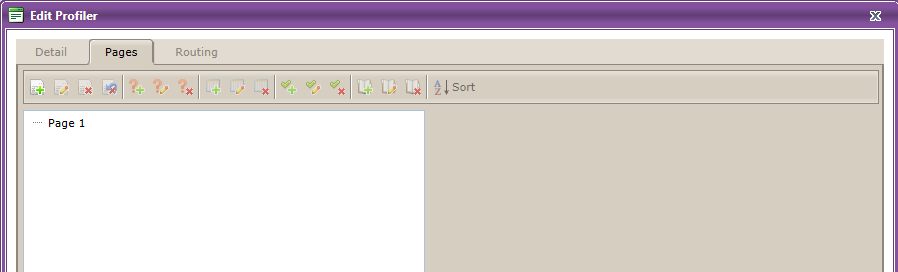
Add another page by clicking on the New Page button again.
Questions can now be added to the pages.
Edit an existing profiler
To edit an existing profiler, select the profiler either by clicking on the profiler name within the Profiler Manager screen, or by checking the box next to the name and selecting Properties from the toolbar. The Edit Profiler screen will be displayed and changes can be made to any of the profiler details.
Edit an existing page
To make a change to a profiler page, click on the Pages tab to display the pages, click on the required page then select Edit Page from the toolbar to open the Edit Profiler Page dialog box.

Press OK to keep changes or Cancel to cancel changes.
Remember that changes are not actually saved until the Save button is pressed on the Edit Profiler screen.
Publishing Profilers
Profilers must be published before they are available to use on Q_Community. To publish a profiler, select the profiler by checking the box next to its name and clicking on Publish in the toolbar.

You will be asked to confirm that you want to publish the selected profiler. Click OK to publish. The Published column will change to True for the selected profiler and the profiler will then be available in Q_Community.
More than one profiler may be published at a time.
As long as a profiler has at least one question on one of its pages it may be published. Profilers marked as deleted may not be published.
How Profilers are displayed in Community
The MARSC My Profilers web part can be used to display a list of profilers for a panellist.
Note that the screen shots shown for Q_Community are just an example of how the website could look using the Q_Panel web parts – the exact design and functionality will be different on your website.
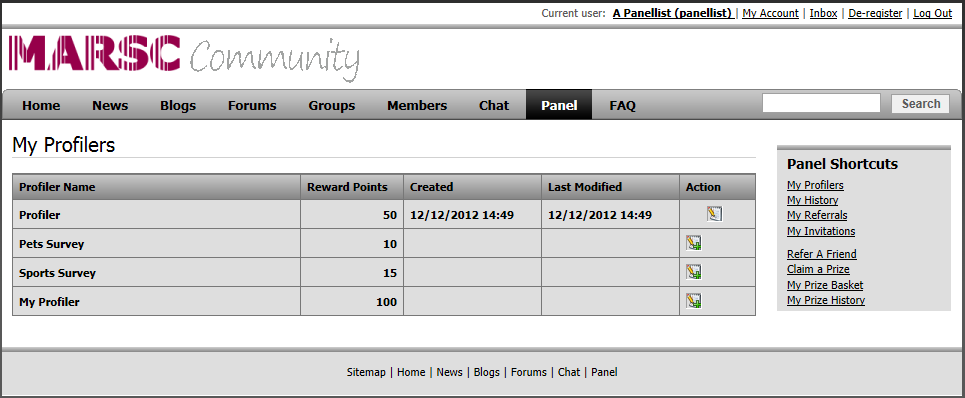
The panellist can choose whether to complete a new profiler for which they may receive a number of reward points, or they can update a profiler which has already been completed.
You will notice that the buttons in the Action column are different for each profiler in this example. Profiler has already been completed and so the only available action is update. Pets Survey, Sports Survey and My Profiler have not yet been completed, so the only action available for these is complete. No additional reward points are available for updating profilers except in the case of profilers where the Pre-Populated flag is checked. For pre-populated profilers the only available action is update, however the first time the profiler is updated the reward points will be awarded.
If the panellist decides to complete My Profiler they will see the following screen:

This is the Start Page of the profiler. The header and footer notes can be seen displayed around the profiler name above the progress bar. The Start Page notes are shown below. If notes were not added to the profiler detail screen these areas would remain blank.
When the panellist clicks on the Next button they will see the first page defined by the user.
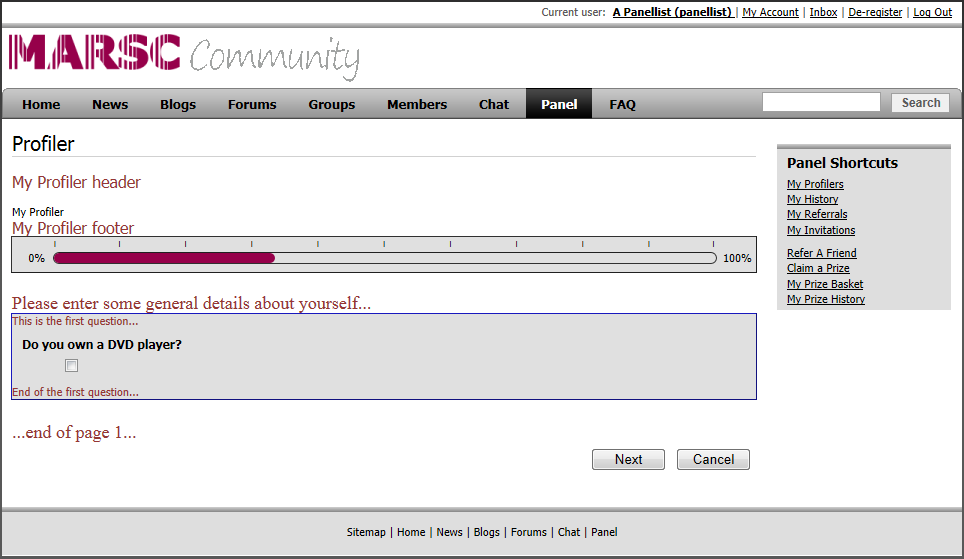
Again the profiler header and footer notes can be seen at the top above the progress bar. The page header and footer notes are displayed above and below the grey question box, and the question header and footer notes are displayed above and below the question within the grey question box.
As there is only one page on this profiler, once the panellist clicks on the Next button they will see the Finish page.

The Finish page notes are displayed beneath the progress bar. When the panellist clicks on the Finish button the Complete page will be displayed with the Complete page notes displayed.

The MARSC My Profiler Wizard web part navigation properties can also be used to change the way a profiler works.
Sorting Profiler Pages
To change the order that profiler pages are displayed within a profiler, the Sort function on the Pages tab should be used.
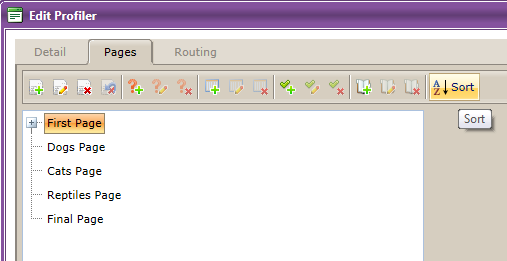
From the Edit Profiler screen select any of the pages by clicking on the name, then click on Sort on the toolbar.
A dialog box will appear showing a list of pages for the current profiler. Deleted pages will also be shown in red.
Note that any pages that have been created and deleted before the profiler has been saved will not appear.
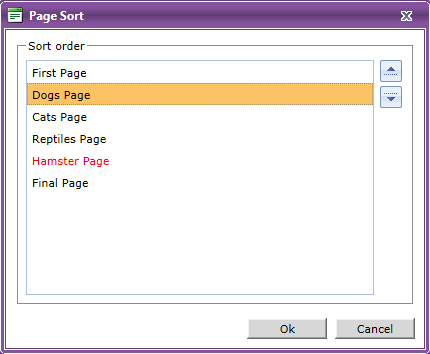
To change the sort order, click on a page and use the sorting arrows to move the page up or down one position.
Once you are satisfied with the order click on the OK button, or click Cancel to leave the order as it was. To make the change permanent remember to click on Save before continuing.
Pages will now be displayed in the new order on the Pages tab, and also when a profiler is run in Q_Community.
If the profiler uses routing, care should be taken when changing the sort order of pages. You will not be allowed to move a destination page to a position before the page that uses it for routing, but there is currently no check made to ensure that a question used in routing is on the current page or on a previous page.
WARNING: profiler routing may not work as expected if pages containing questions used in routing are sorted into a different order.
Deleting Profiler Pages
Profiler pages may be deleted from a profiler, but are not permanently removed from the database.
This is known as a soft-delete. Deleting a page in this way means that it can be un-deleted if necessary at a later stage. This can be useful as a way of making a page temporarily unavailable.
To delete a profiler page the Delete Page function on the Pages tab should be used.
From the Pages tab of the Edit Profiler screen select the required page by clicking on its name, then click on Delete Page on the toolbar.

The page will disappear from the screen.
By default, the Pages tab does not show deleted pages. To see the deleted pages select the Show Deleted Pages check box at the bottom of the screen. Any deleted pages will be shown in red.

Pages may only be deleted one at a time.
A page cannot be deleted if it is used for routing, either because it contains a question used in routing or because it is specified as a page which can be routed to.
It should be noted that if a new page is created and later deleted while still in the Edit Profiler screen without actually being saved (by clicking on Save) then the page will not be shown when Show Deleted Pages is checked and the page will not be available for un-deleting.
Undo Delete Profilers Pages
Profiler pages that have been deleted can be made available again by un-deleting (provided they were previously saved).
To un-delete a profiler page the Undo Delete Page function on the Pages tab should be used.
From the Pages tab of the Edit Profiler screen ensure that Show Deleted Pages is checked, then select the required page by clicking on its name, (deleted pages are shown in red) then click on Undo Delete Page on the toolbar.
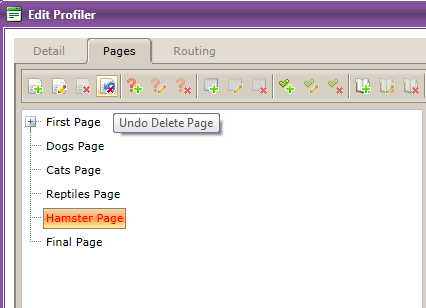
The deleted profiler page will now be available and again be shown in black. It can also again be used when running the profiler in Q_Community (assuming the profile has been published).
Only one profiler page can be un-deleted at a time.
Deleting Profilers
Profilers may be deleted from Profiler Manager, but are not permanently removed from the database. Deleted profilers cannot be displayed on Q_Community.
This is known as a soft-delete. Deleting a profiler in this way means that it can be un-deleted if necessary at a later stage. This can be useful as a way of making a profiler temporarily unavailable. The profiler may still be edited while it is deleted.
To delete a profiler select it by clicking on the check box next to the profiler name, then click on Delete in the toolbar.
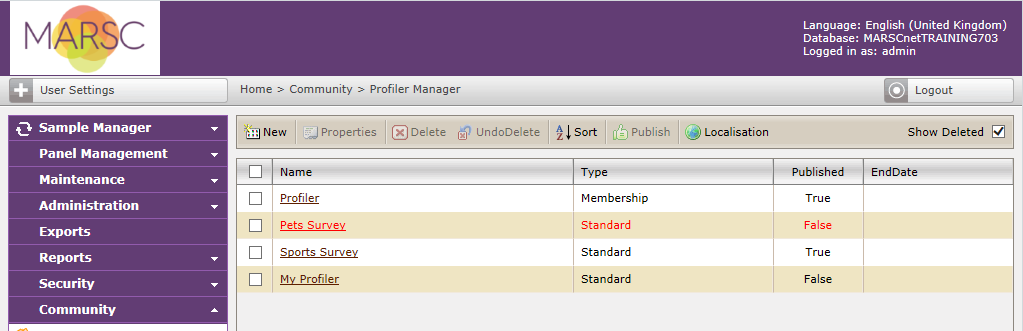
The profiler will disappear from the screen. If it has previously been published it will also disappear from Q_Community.
By default, Profiler Manager does not show deleted profilers. To see the deleted profilers select the Show Deleted check box on the toolbar. Any deleted profilers will be shown in red.
More than one profiler may be deleted at a time by selecting more than one profiler before clicking on Delete.
Undo Delete Profilers
Profilers that have been deleted can be made available again by un-deleting.
To un-delete a profiler select it by clicking on the check box next to the profiler name, then click on Undo Delete in the toolbar.
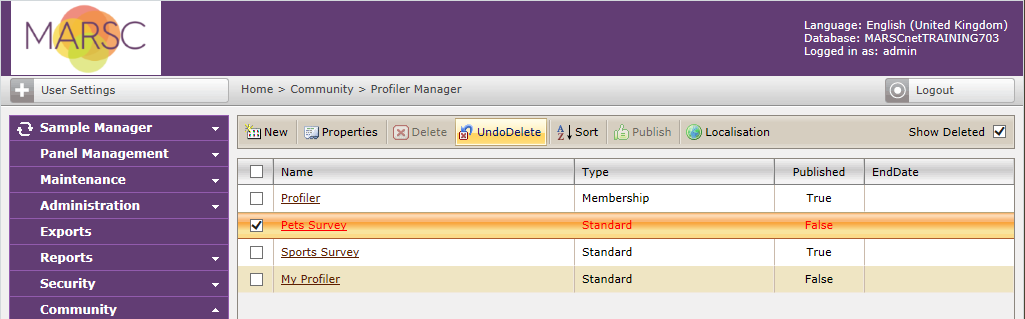
The profiler will no longer be deleted. It will need to be published in order to be available again in Q_Community.
More than one profiler may be un-deleted at a time by selecting more than one profiler before clicking on Undo Delete.
Sorting Profilers
There are two methods of sorting within Profiler Manager.
Profilers can be sorted alphabetically by Name, Type or Published flag by clicking on the appropriate column header. This method of sorting has only a temporary effect which lasts until you have finished using Profiler Manager. It has no effect on the sort order within My Profilers.
To change the order that profilers are shown on the My Profilers screen the Sort function on the toolbar should be used.
More complex ordering and/or profiler filtering can also be done using the data filter properties of the web part. See the MARSC My Profilers web part article for more information.
From the Profiler Manager screen click on Sort on the toolbar.
A dialog box will appear showing a list of profilers. If there are any deleted profilers they will also be shown in red.
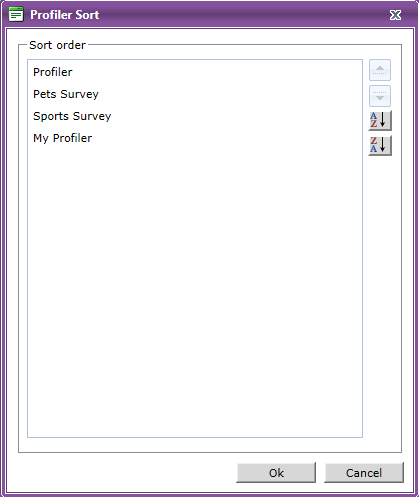
To change the sort order, click on a profiler and use the sorting arrows to move the profiler up or down one position. The profilers can also be sorted in alphabetical or reverse alphabetical order.
Once you are satisfied with the order click on the OK button, or click Cancel to leave the order as it was. The Profilers will now be displayed in the specified order in Q_Community.
Note that if the MARSC My Profilers web part uses customised data filter options for the Community site, then sorting profilers within Q_Panel may have no effect as the web part options will over-ride it. See the MARSC My Profilers web part article for more information.