Selecting panellists for group actions using Panel Manager
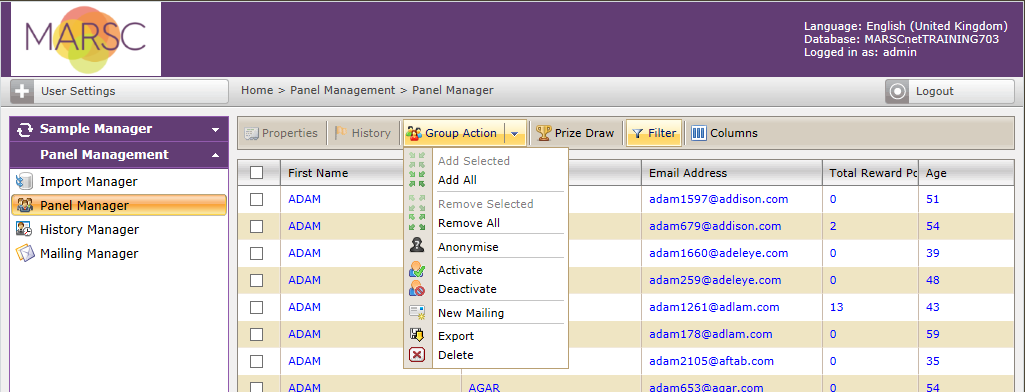
Some functions in Panel Manager are group actions and can be found under the Group Action menu on the toolbar.
Group actions are performed on a group of panellists that have been returned by the filter. The group may contain all the panellists returned by the filter (which it does by default), or if you only want to perform the action on a subset of the filter results returned, you can refine the group as necessary by removing or adding panellists.
After executing a filter, the bottom bar of the screen displays some group counts. For example, it may show the following:

In Group
The number of panellists returned by the filter currently in the group.
To make it easier to see which panellists are in the group, the In Group count displays in blue, and all the panellists that are currently in the group are also displayed in blue.
When a filter is executed all panellists returned are automatically in the group and therefore will all be displayed in blue.
NOT In Group
The number of panellists returned by the filter that are not in the group.
To make it easier to see which panellists are not in the group, the NOT In Group count displays in black, and all the panellists that are currently not in the group are also displayed in black.
When a filter is executed all panellists returned are automatically in the group, so the NOT In Group count will always be zero immediately after filter execution.
When using any of the functions within the Group Action menu (sending emails, updating panellist status, deleting, anonymising or exporting results) the action will be performed on all the panellists currently in the group, not just those on the current page. Panellists may be added or removed from the group using the Add and Remove functions within the Group Action menu.
It is important to note the distinction between the selection method for Properties and Event History, and the selection method for Group Actions.
The Properties and Event History functions use the checkbox next to the panellist record as selection criteria, and therefore these functions are only available for panellists on the current page of results. Group Actions are performed on all panellists in the group and therefore are available for one or more panellists from the current filter results which could cover many pages.
Removing panellists from the group
The Group Action dropdown list in the toolbar has two options for removing panellists from the group.
- Remove Selected
Removes panellists from the group that have the checkbox next to their name ticked.
If the filter returned more than one page of results then you may need to page through the results in order to remove all the panellists required.
- Remove All
Removes all panellists from the group.
For example, we may execute a filter that returns several pages of results. After examining the data, we decide to email most, but not all of the panellists, so we need to remove from the group the panellists that are not to receive an email.
On the first page, select two panellists to remove, and click on Remove Selected from the Group Action dropdown on the toolbar.
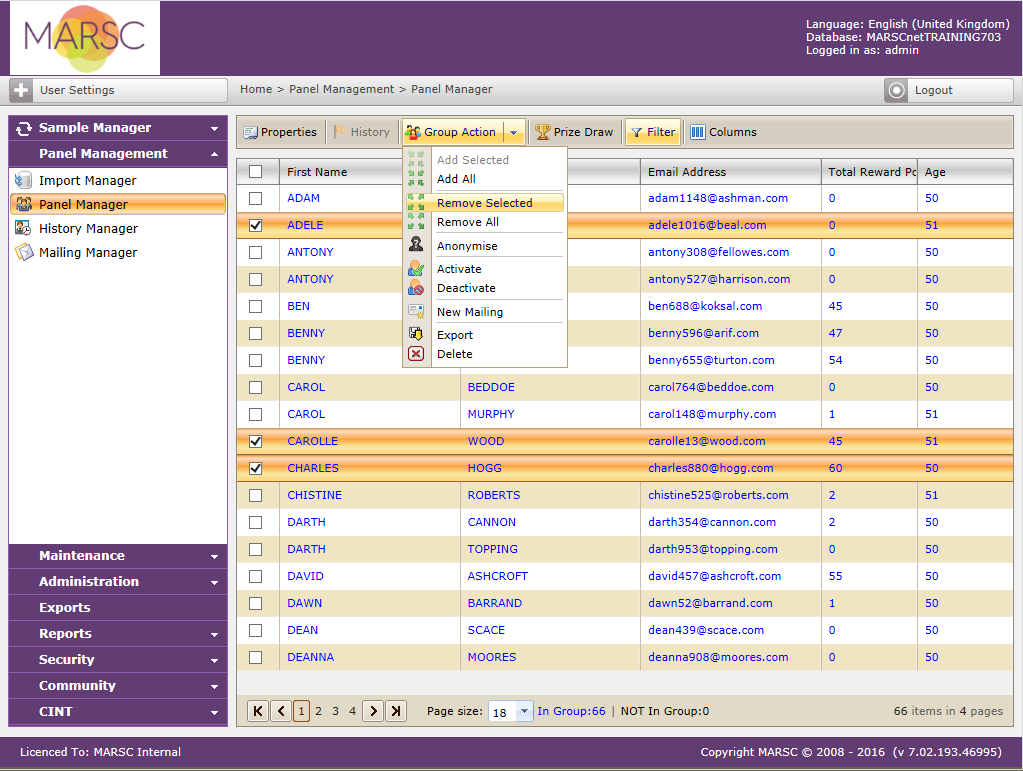
The three panellists removed from the group appear in black rather than blue, and the In Group and NOT In Group counts are updated to reflect this.

We also want to remove some panellists from pages 2, 3 and 4 of the filter results, so go to the next pages of results, using the arrow keys at the bottom on page, and repeat the procedure.

We have now removed 9 panellists from the group. Page through the results to check that the correct panellists are in the group before selecting Email from the Group Action menu.
Adding panellists to the group
The Group Action dropdown list in the toolbar has two options for adding panellists to the group.
- Add Selected
Adds panellists to the group that have the checkbox next to their name ticked.
If the filter returned more than one page of results then panellists need to be added one page at a time using this method.
- Add All
Adds all panellists returned by the filter to the group.
For example, we may execute a filter that returns several pages of results. After examining the data we decide to change the status of just a few of the panellists. The simplest way to do this is to remove all the panellists from the group then add only the panellists that are to be activated.
First remove all the panellists by selecting Remove All from the Group Action dropdown list on the toolbar.
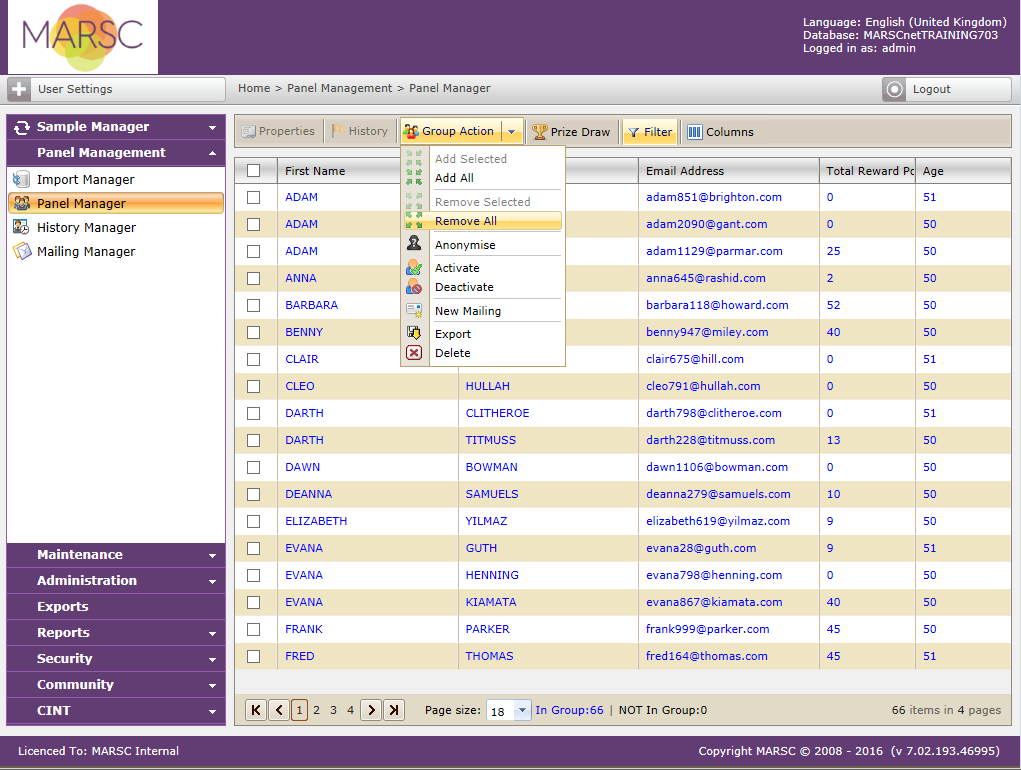
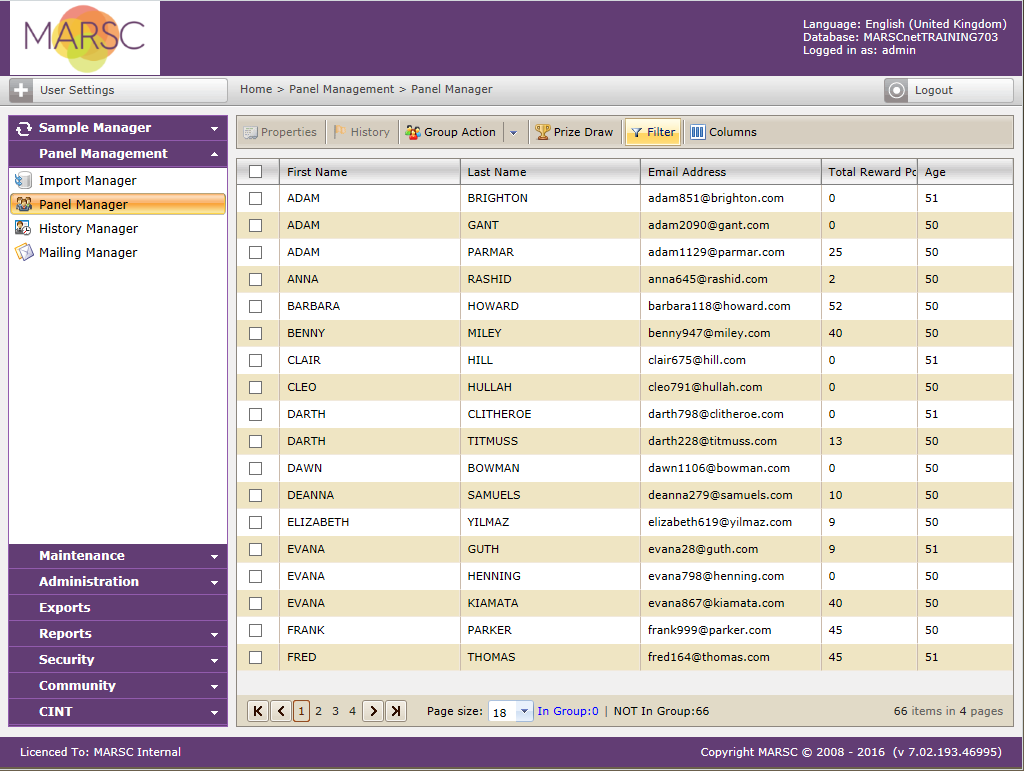
All the panellists appear in black to show they have been removed from the group, and the In Group count has changed to zero.
On the first page, we then choose the panellists to add to the group, and select Add Selected from the Group Action dropdown on the toolbar.

The selected panellists now appear in blue again, and the In Group and NOT In Group counts are updated appropriately.

There may be panellists on the other results pages to be added to the group in order to perform the group action, so navigate to each page and repeat the process to add panellists. When you have finished, the In Group and NOT In Group counts will show the appropriate numbers. Page through the filter results to check you have selected the correct panellists before clicking on Activate from the Group Action toolbar.